The Content Agent writes articles designed to be cited by AI, not just to rank on Google.
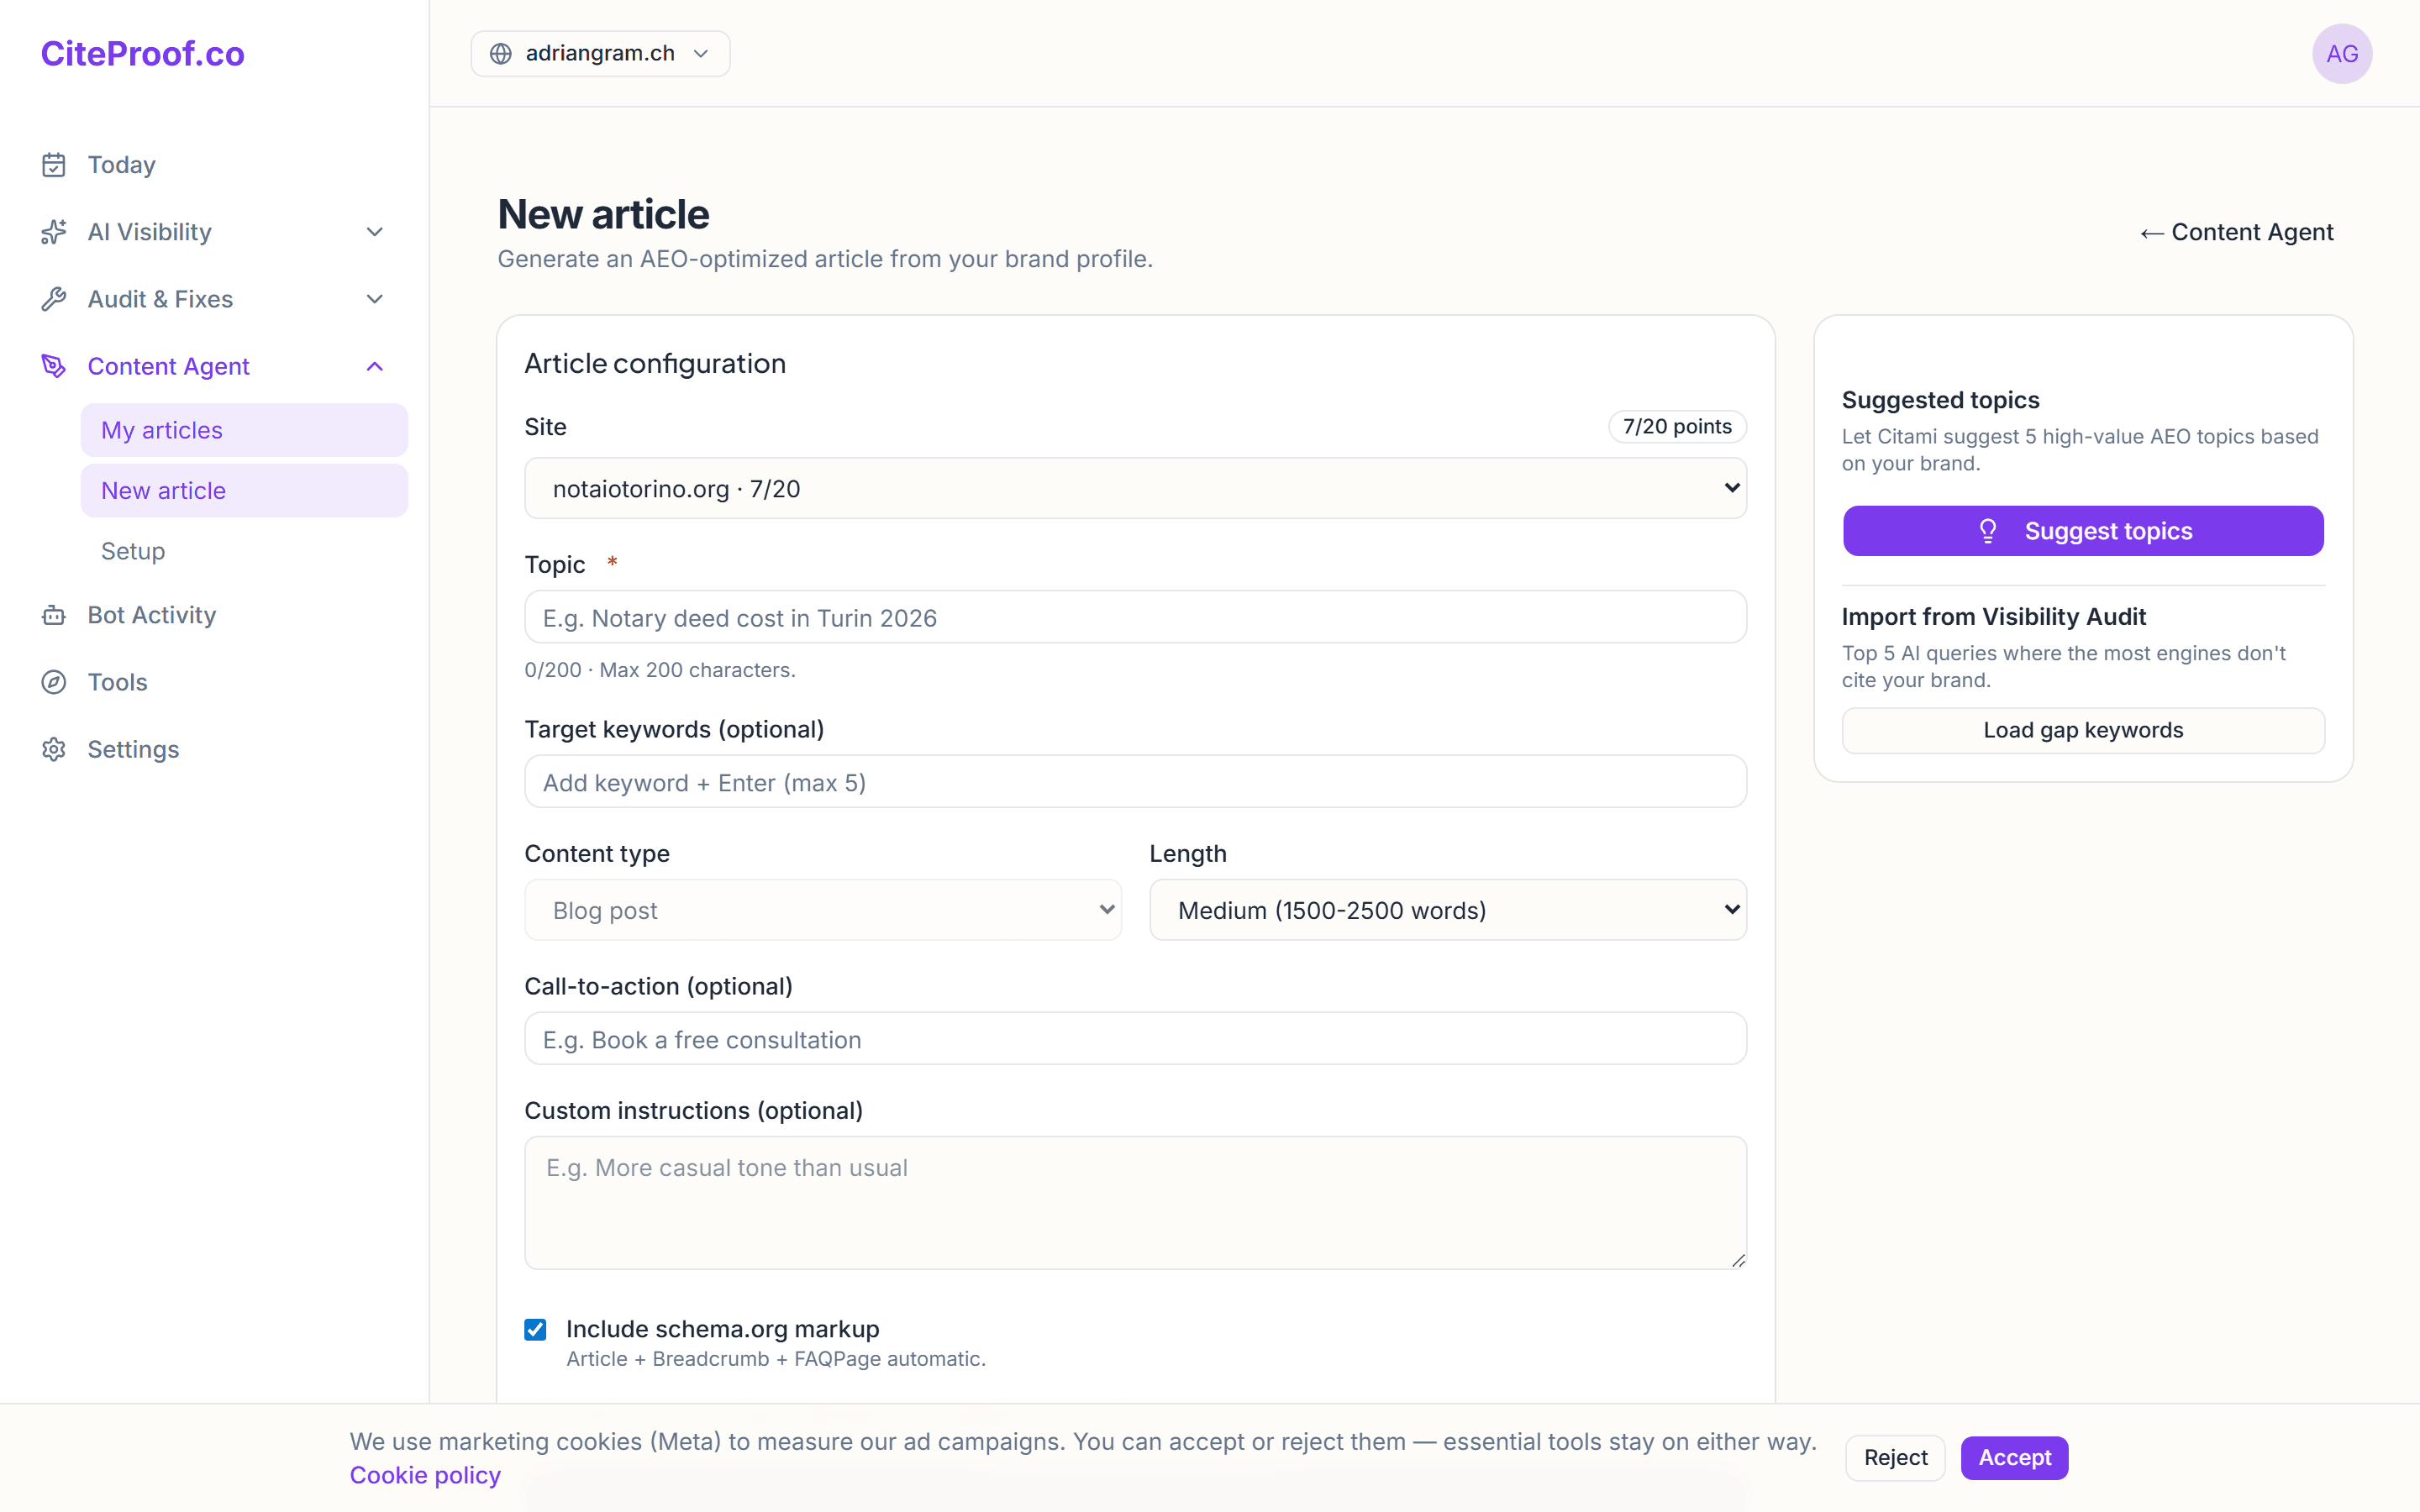
Starting generation
Go to Content Agent → New article and specify:
- the content type (blog post, landing page, meta description),
- the topic and target keywords,
- length and tone.
Hit generate: the article is created in the background. Each type/length consumes a number of points from your quota (see the quota guide).
What happens behind the scenes
- The agent writes the article (title, body, meta description, structured data).
- It runs the quality checks (originality, compliance, style): an article that fails them isn't published.
- It generates the images — one hero image and two in-content images — in the background, right after the article is "ready".
Review and edit
When the status turns ready, open the article: there's an editor where you can change text and images, with an HTML preview alongside. While images are generating you'll see an "Generating images…" notice, and the page refreshes on its own when they're ready.
Then what?
From here you can mark it ready, export it (Markdown/HTML) or publish it to WordPress (see the dedicated guide).
What happens if the article fails the quality checks?
It isn't published and your quota isn't improperly consumed: the agent retries, and if the issue is serious (e.g. compliance) the article is flagged as failed rather than shipping with a defect.
Are images included?
Yes: every article gets one hero image and two in-content images, generated automatically after the text is ready.